How to Grow Sprouts in a Jar


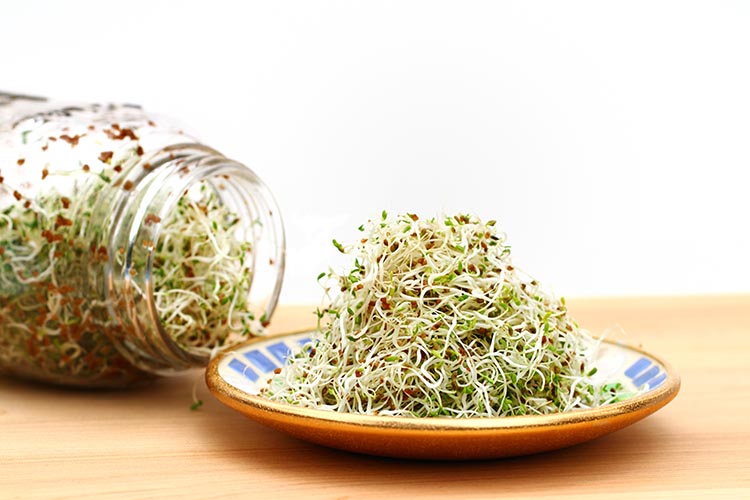
Sprouts are perfect for adding extra flavor, crunch and nutrition to all kinds of dishes, especially when you don’t have any fresh greens on hand. Considered a “superfood” by nutrition experts, they have a very high concentration of vitamins, antioxidants and minerals when compared to mature vegetables. Sprouts are also one of the easiest (and cheapest) foods you can grow indoors. They don’t require much space or any fancy equipment. In fact, all you need is a jar and a bit of kitchen counter space to start converting seeds, grains and legumes into fresh, nutrient-rich greens in just a few days. Just follow the five simple steps below to learn how to start growing your own sprouts in a jar.
See more: Indoor Gardening Guide
Supplies You Will Need
- Wide-mouth jars (Mason jars are ideal.)
- Sprouting seeds – Broccoli, radish and alfalfa sprouting seeds all work very well, as do lentils, mung beans and peas. Purchasing sprouting-specific seeds is always recommended because they’ve been tested for harmful bacteria. (Unlike a bag of lentils from the supermarket, for example, which is meant to be boiled before eating).
- Cheesecloth or sprouting screens/lids
See more: How to Grow Your Own Sweet Potatoes
How to Grow Sprouts in a Jar
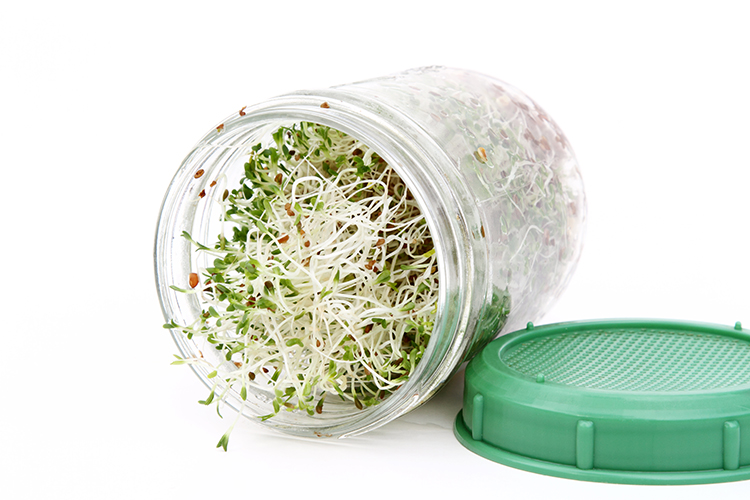
- First, you’ll have to soak your seeds. Different seed varieties require different amounts of water, but the general rule of thumb is one part seeds to three parts water. (You can find a useful Seed Sprouting Chart for the seed amounts you should use here.) To start, add your seeds to the jar and fill with three parts cool water. Stir to make sure all seeds are wet. Cover the jar with a sprouting screen or lid, or a cheesecloth attached with a rubber band, and leave it to soak. Seeds and legumes generally take 6 to 8 hours to soak.
- After soaking, drain out all the water through the cheesecloth or lid and refill the jar with cool, fresh water. Swirl the jar to rinse the seeds and let it drain out again, shaking the jar to get as much water out as possible.
- Prop the jar upside down in a bowl with the bottom of the jar resting against the edge of the bowl so all excess water can drain out. (You can purchase sprouting stands for this step, but a bowl works just as well). Leave the bowl like this on the kitchen counter or in another spot where you won’t forget about it. You don’t need a sunny spot, but it does need to breathe, so inside a cabinet isn’t advised.
- Drain and rinse the seeds with fresh water, repeating steps 2 and 3, twice a day. Baby sprouts will begin to emerge after just a day or two. The sprouts are ready once they reach 1 to 2 inches in length (this generally takes 3 to 6 days).
- When you’re ready to harvest, rinse the sprouts one final time, drain out the water and turn the sprouts out onto a clean dish towel to dry completely. Then they’re ready to use in your favorite recipes!
To store your sprouts, first make sure they are completely dry. Then wrap the sprouts in a paper towel or dish towel, place them in a glass container with a lid, and store them in the fridge for up to a week.
How to Use Sprouts
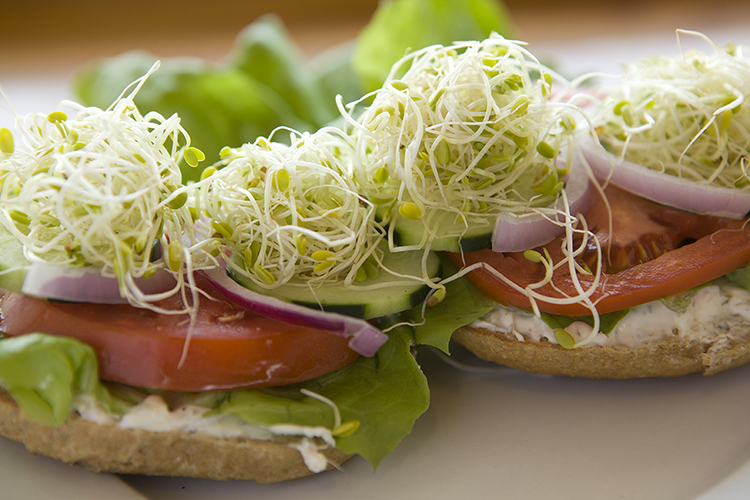
You can add your homegrown sprouts to salads or stir-fries, put them on sandwiches, wraps and burgers, use them as a healthy garnish for all kinds of dishes, or even blend them into fruit smoothies for an extra dose of nutrition.